Volumetric Line Blend - Icy Jade with Rutile
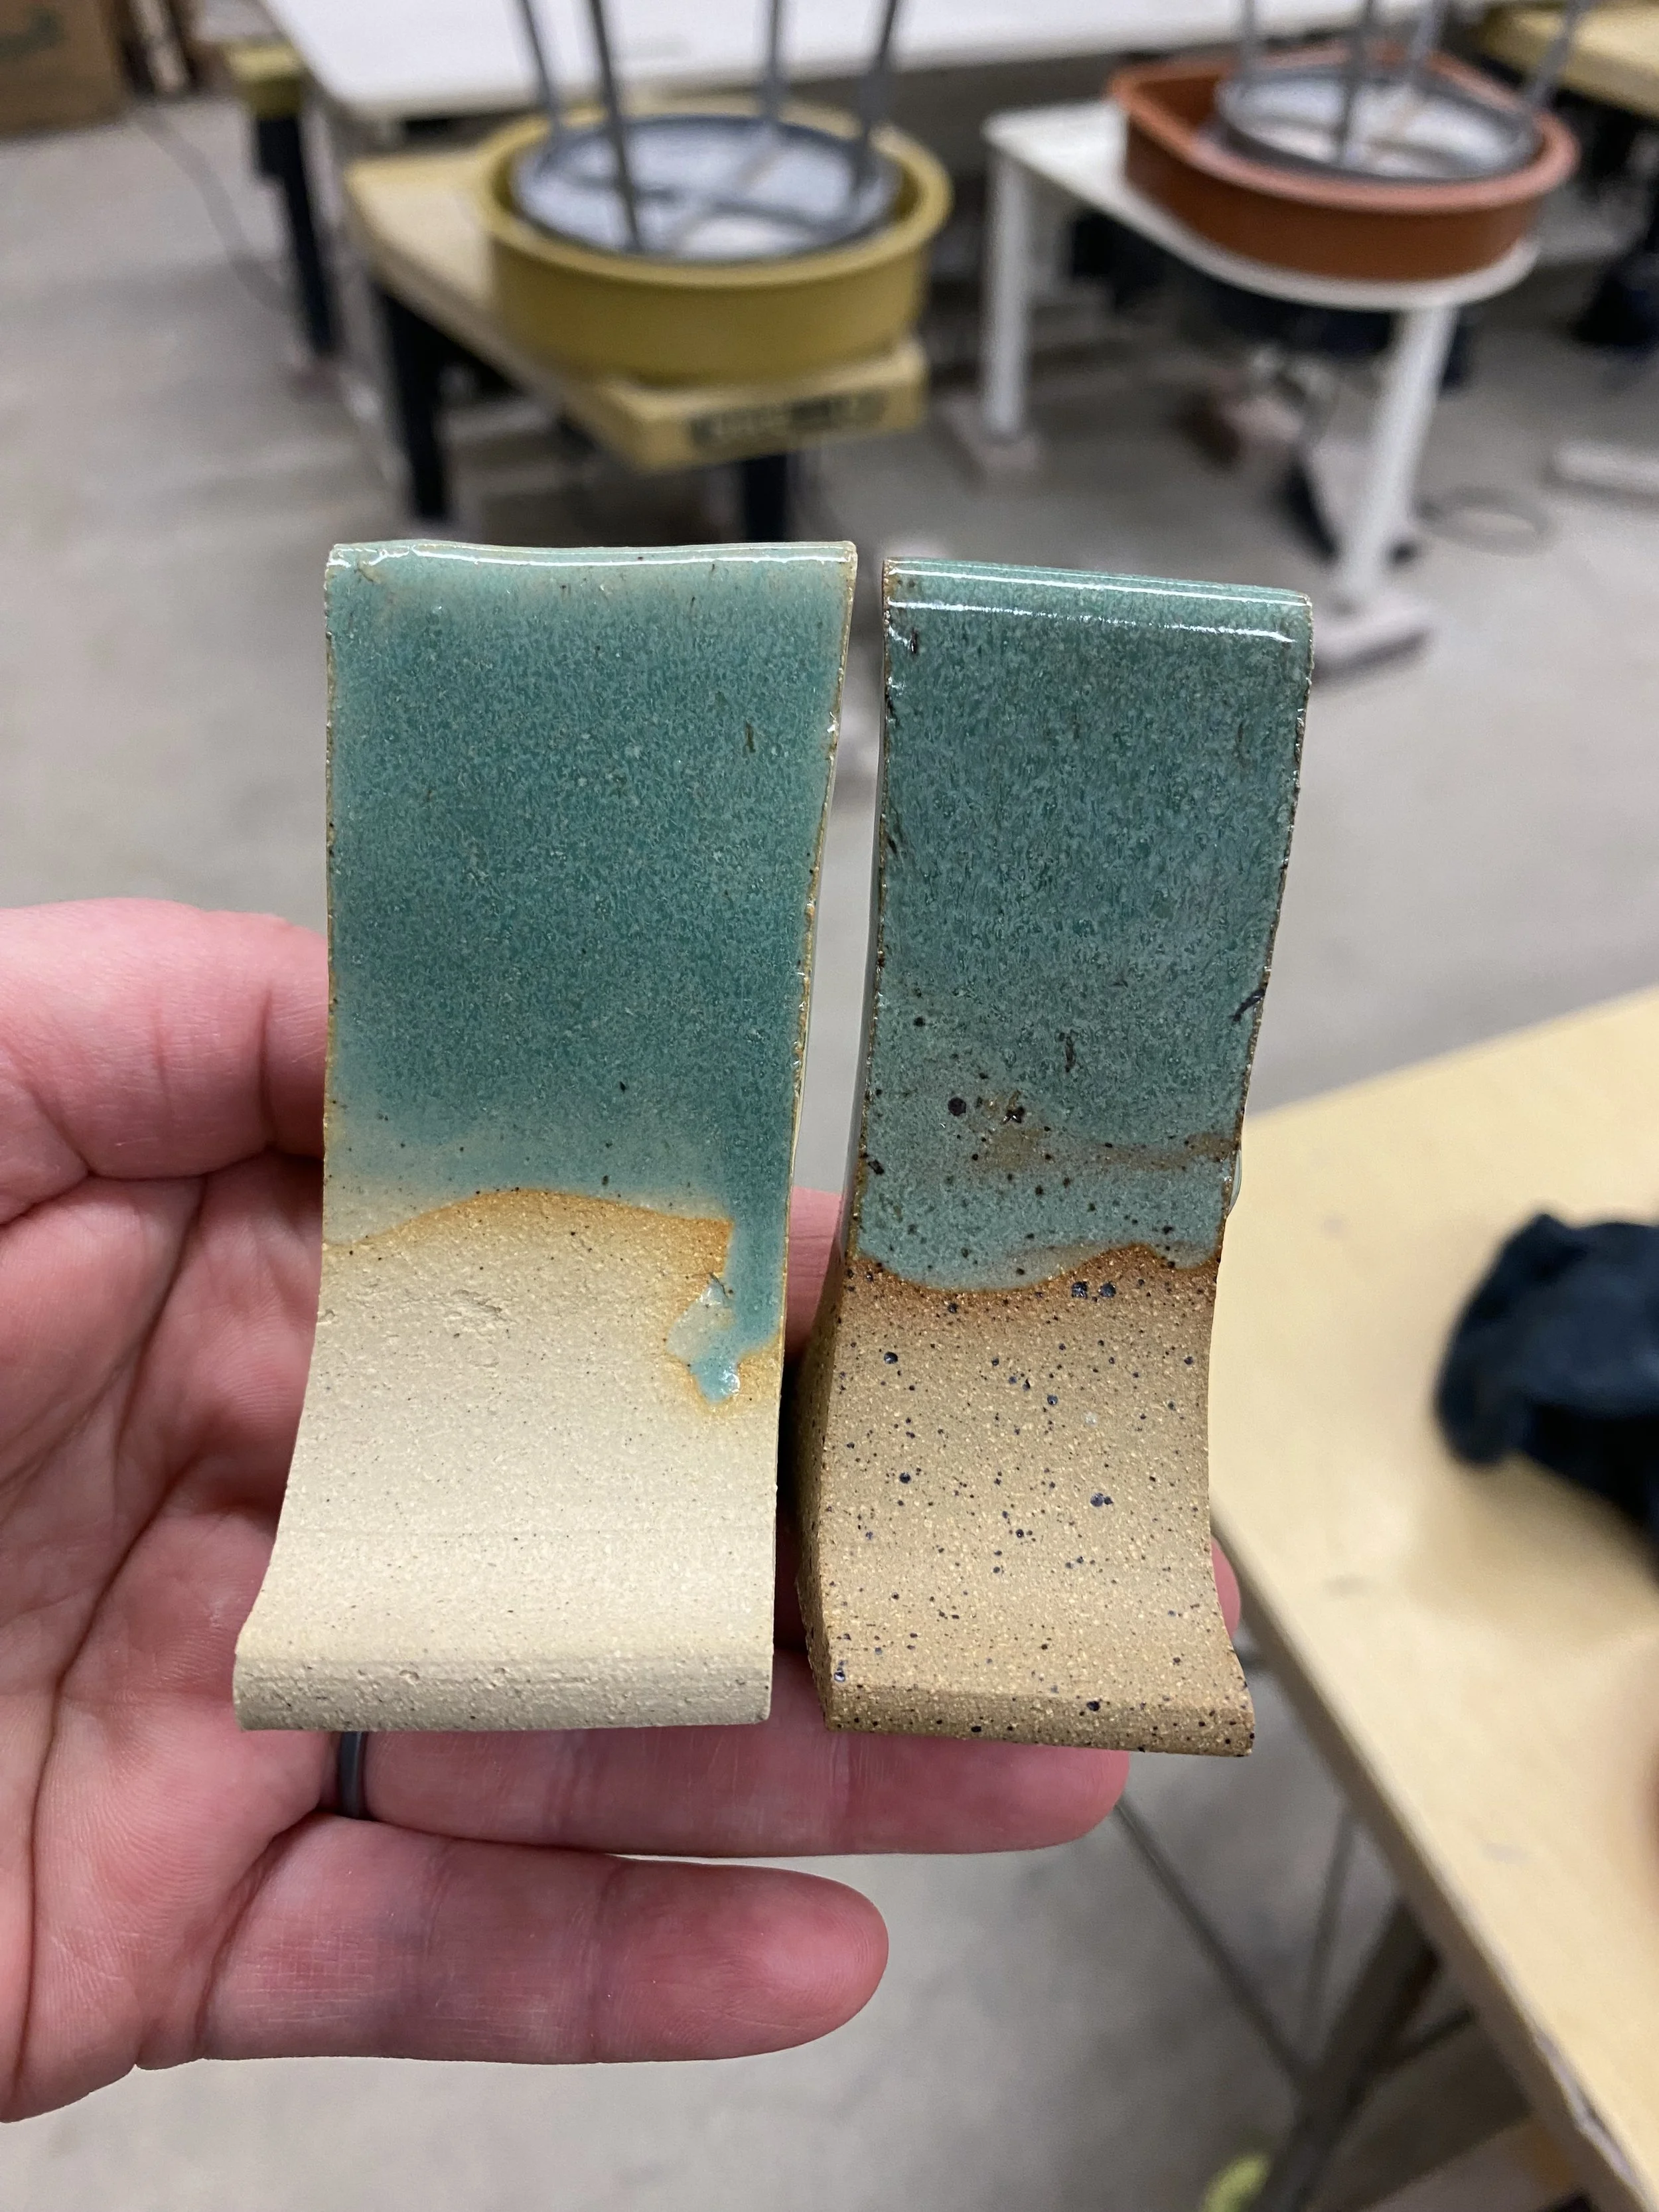
Icy Blue Recipe - No Rutile Added. On Standard 553 (Left) and Standard 112 (right)
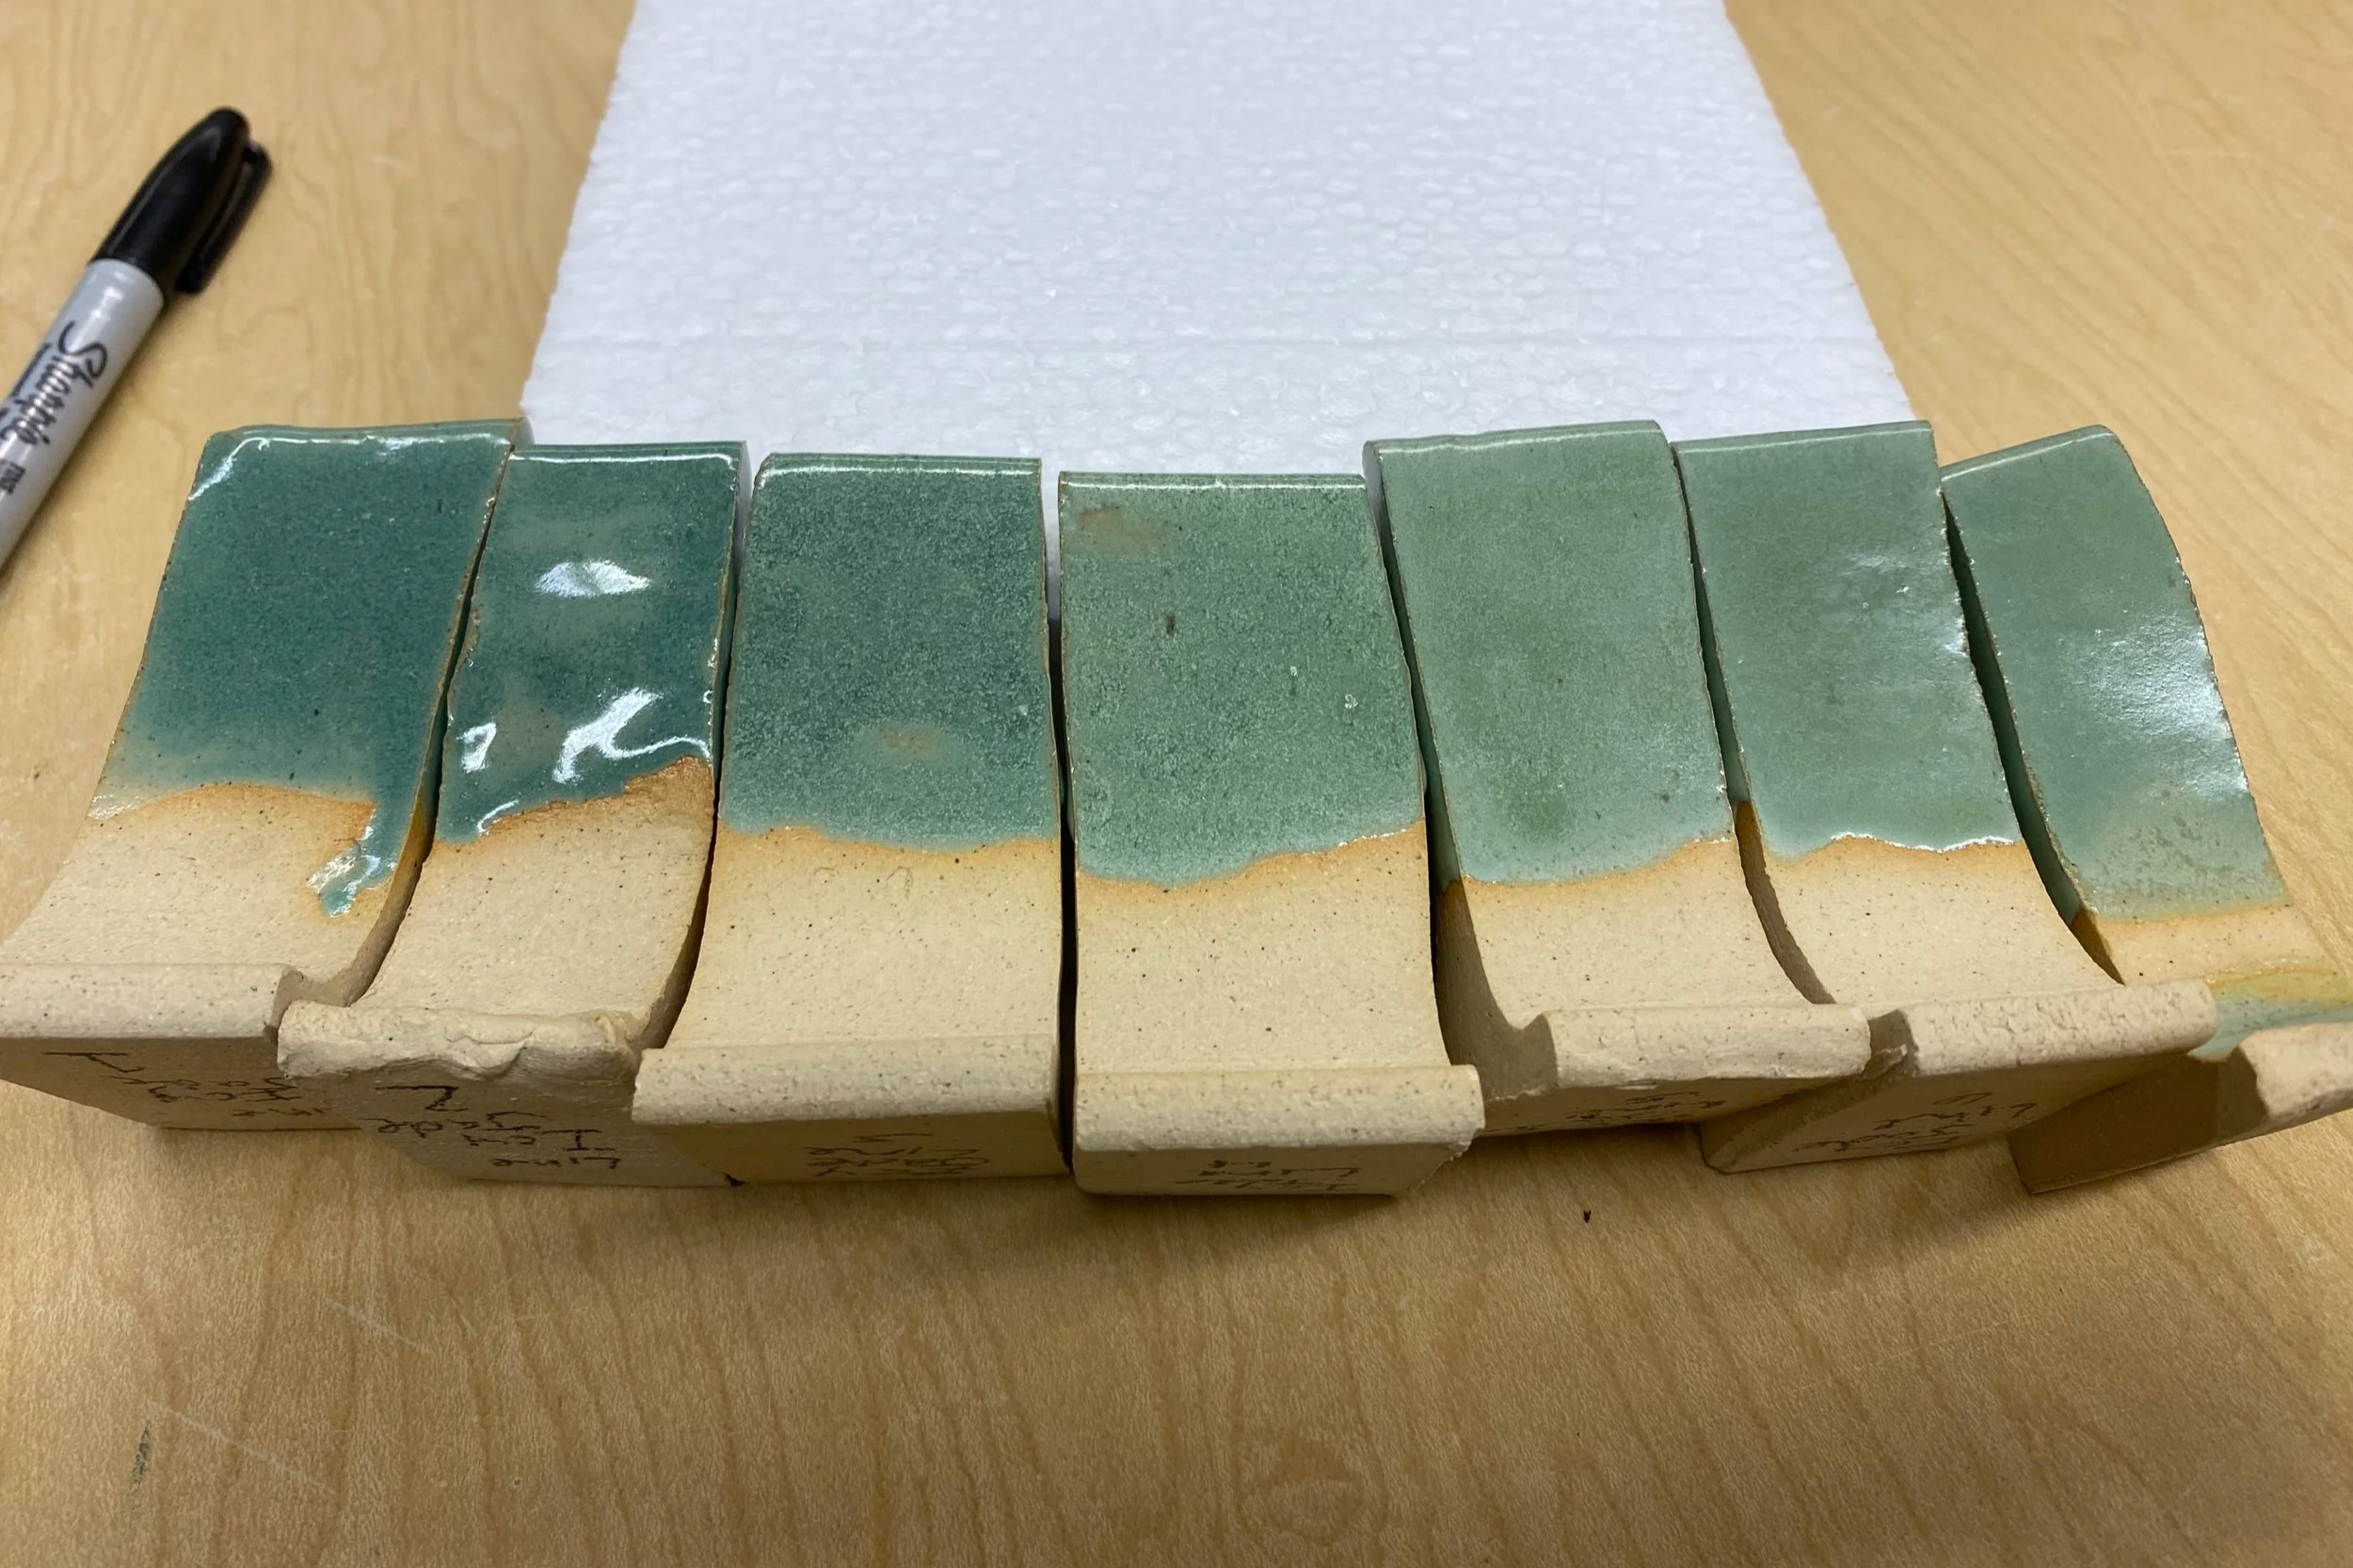
Icy Jade, Left - Right 0%, 1%, 2%, 3%, 4%, 5%, 6% Rutile added. On Standard 553 Buff to Cone 6.
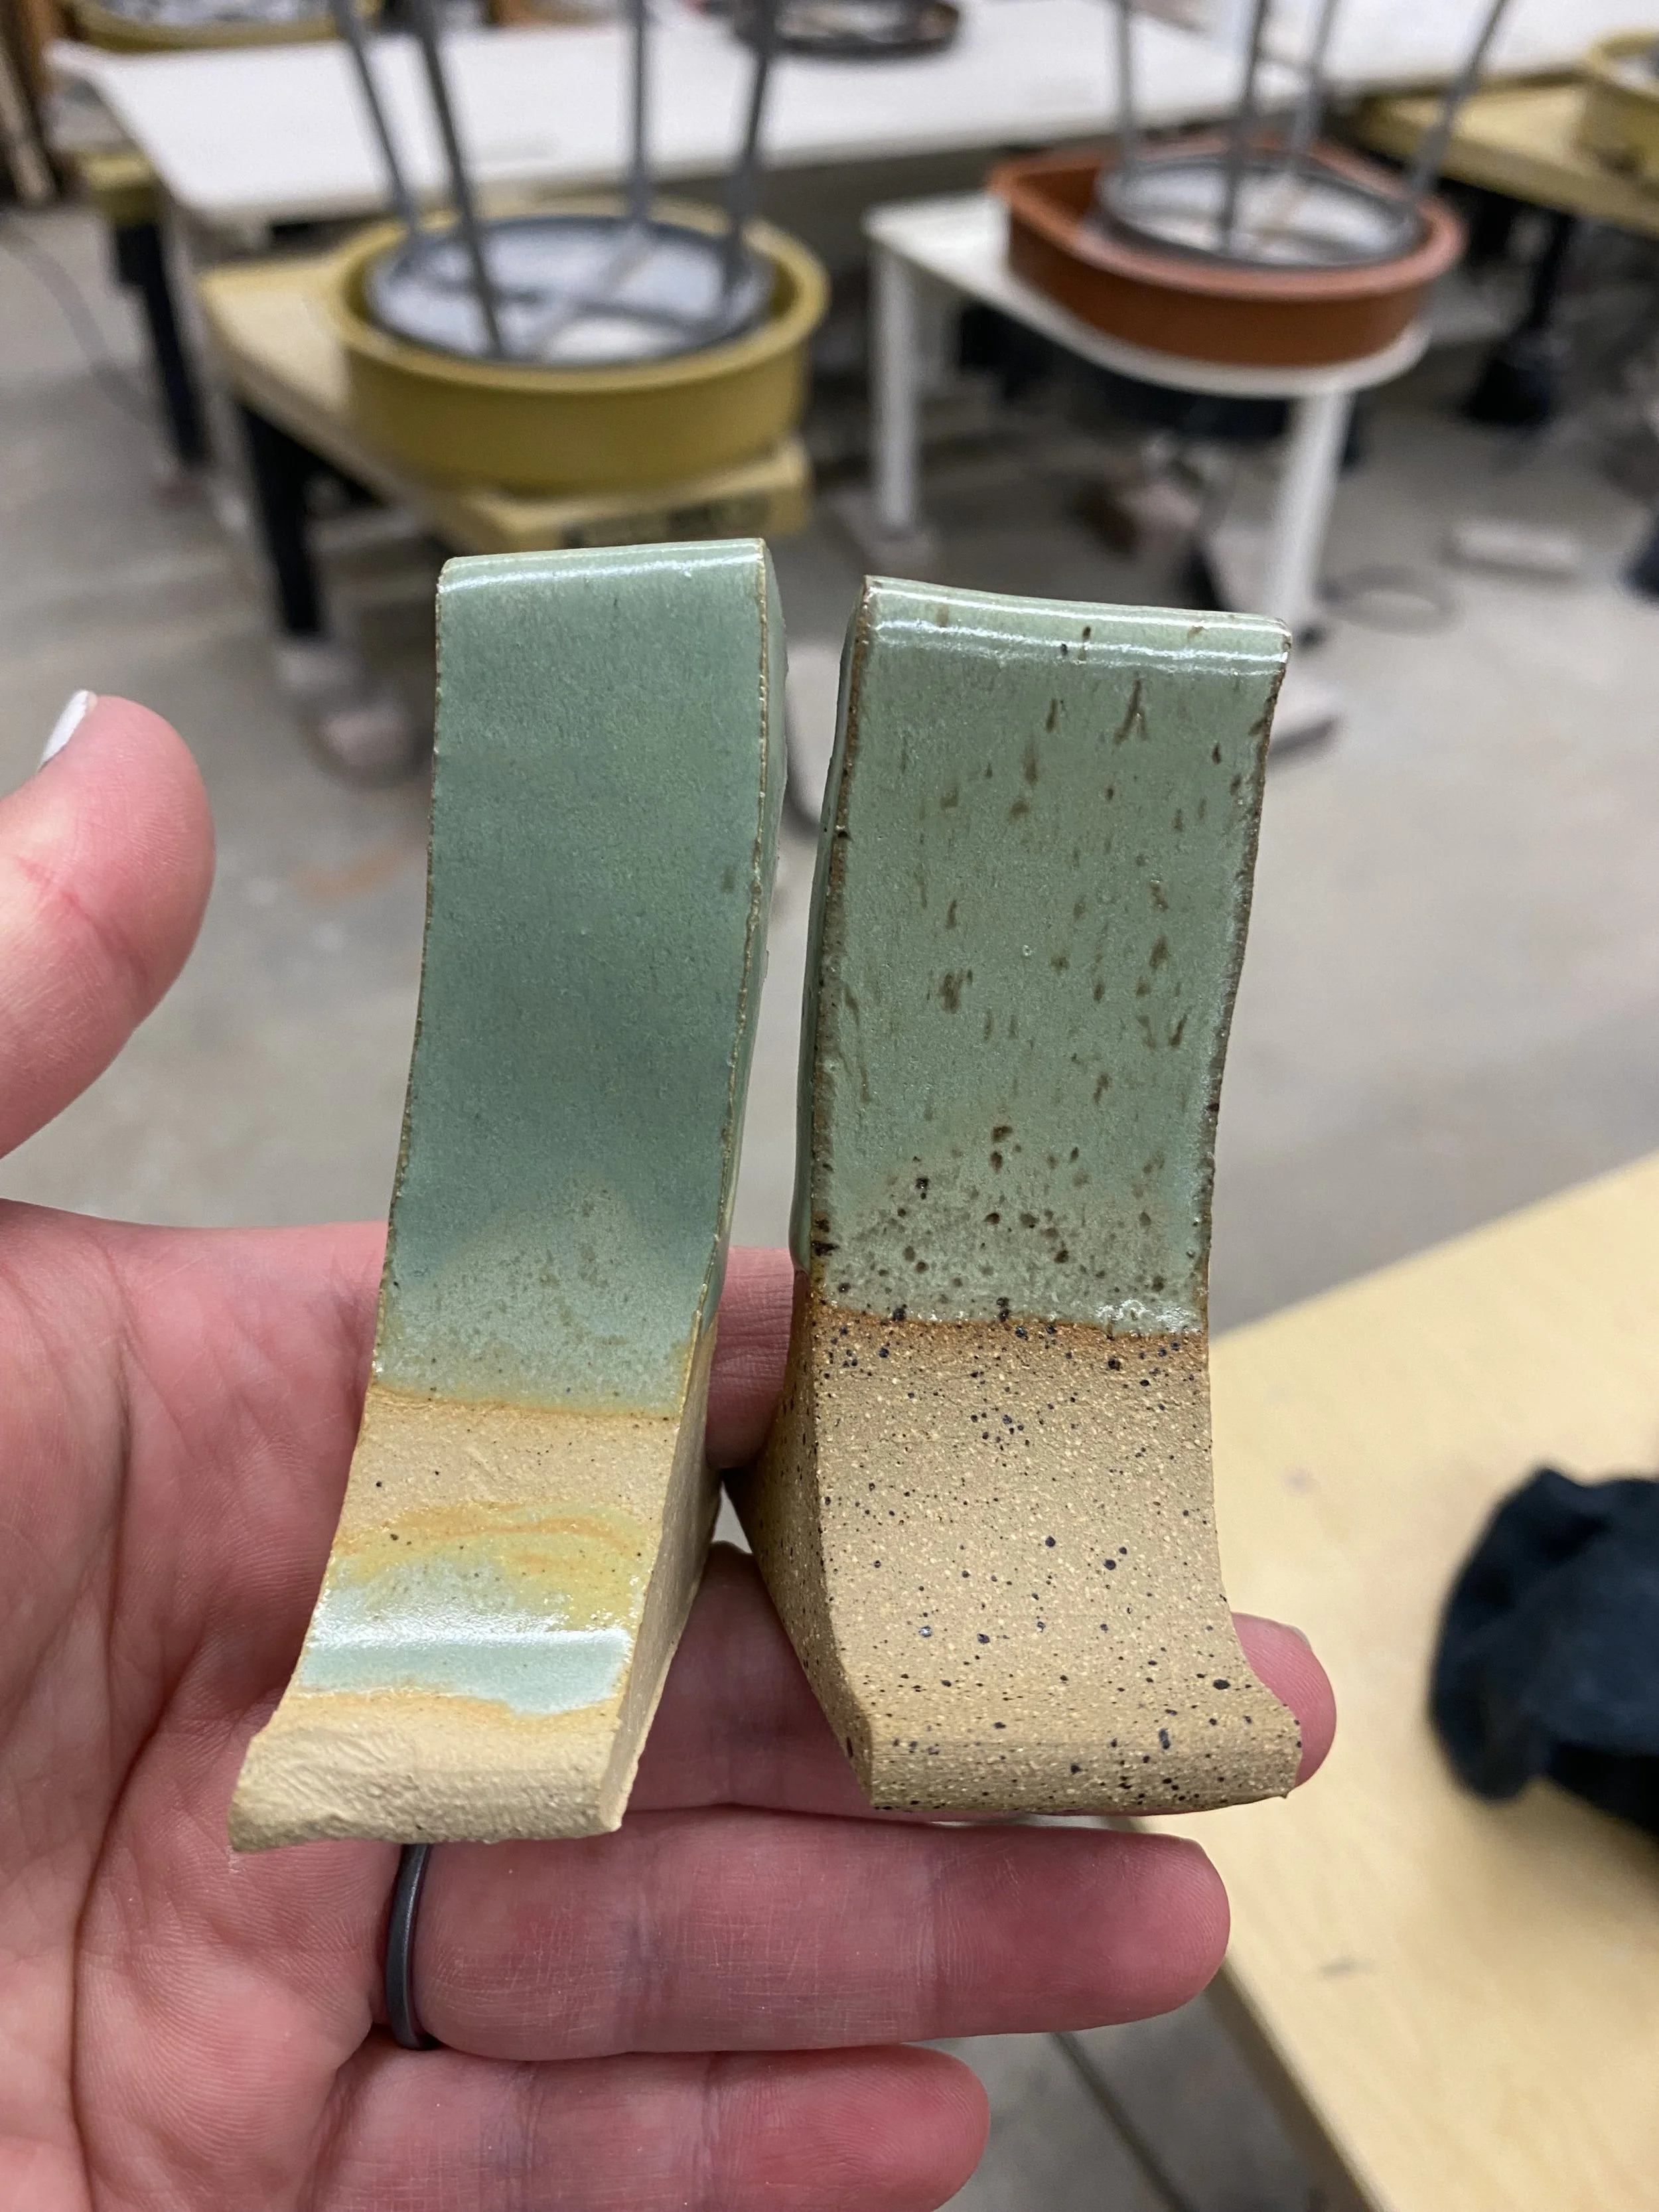
Icy Blue Recipe - 6% Rutile added. On Standard 553 (Left) and Standard 112 (right)
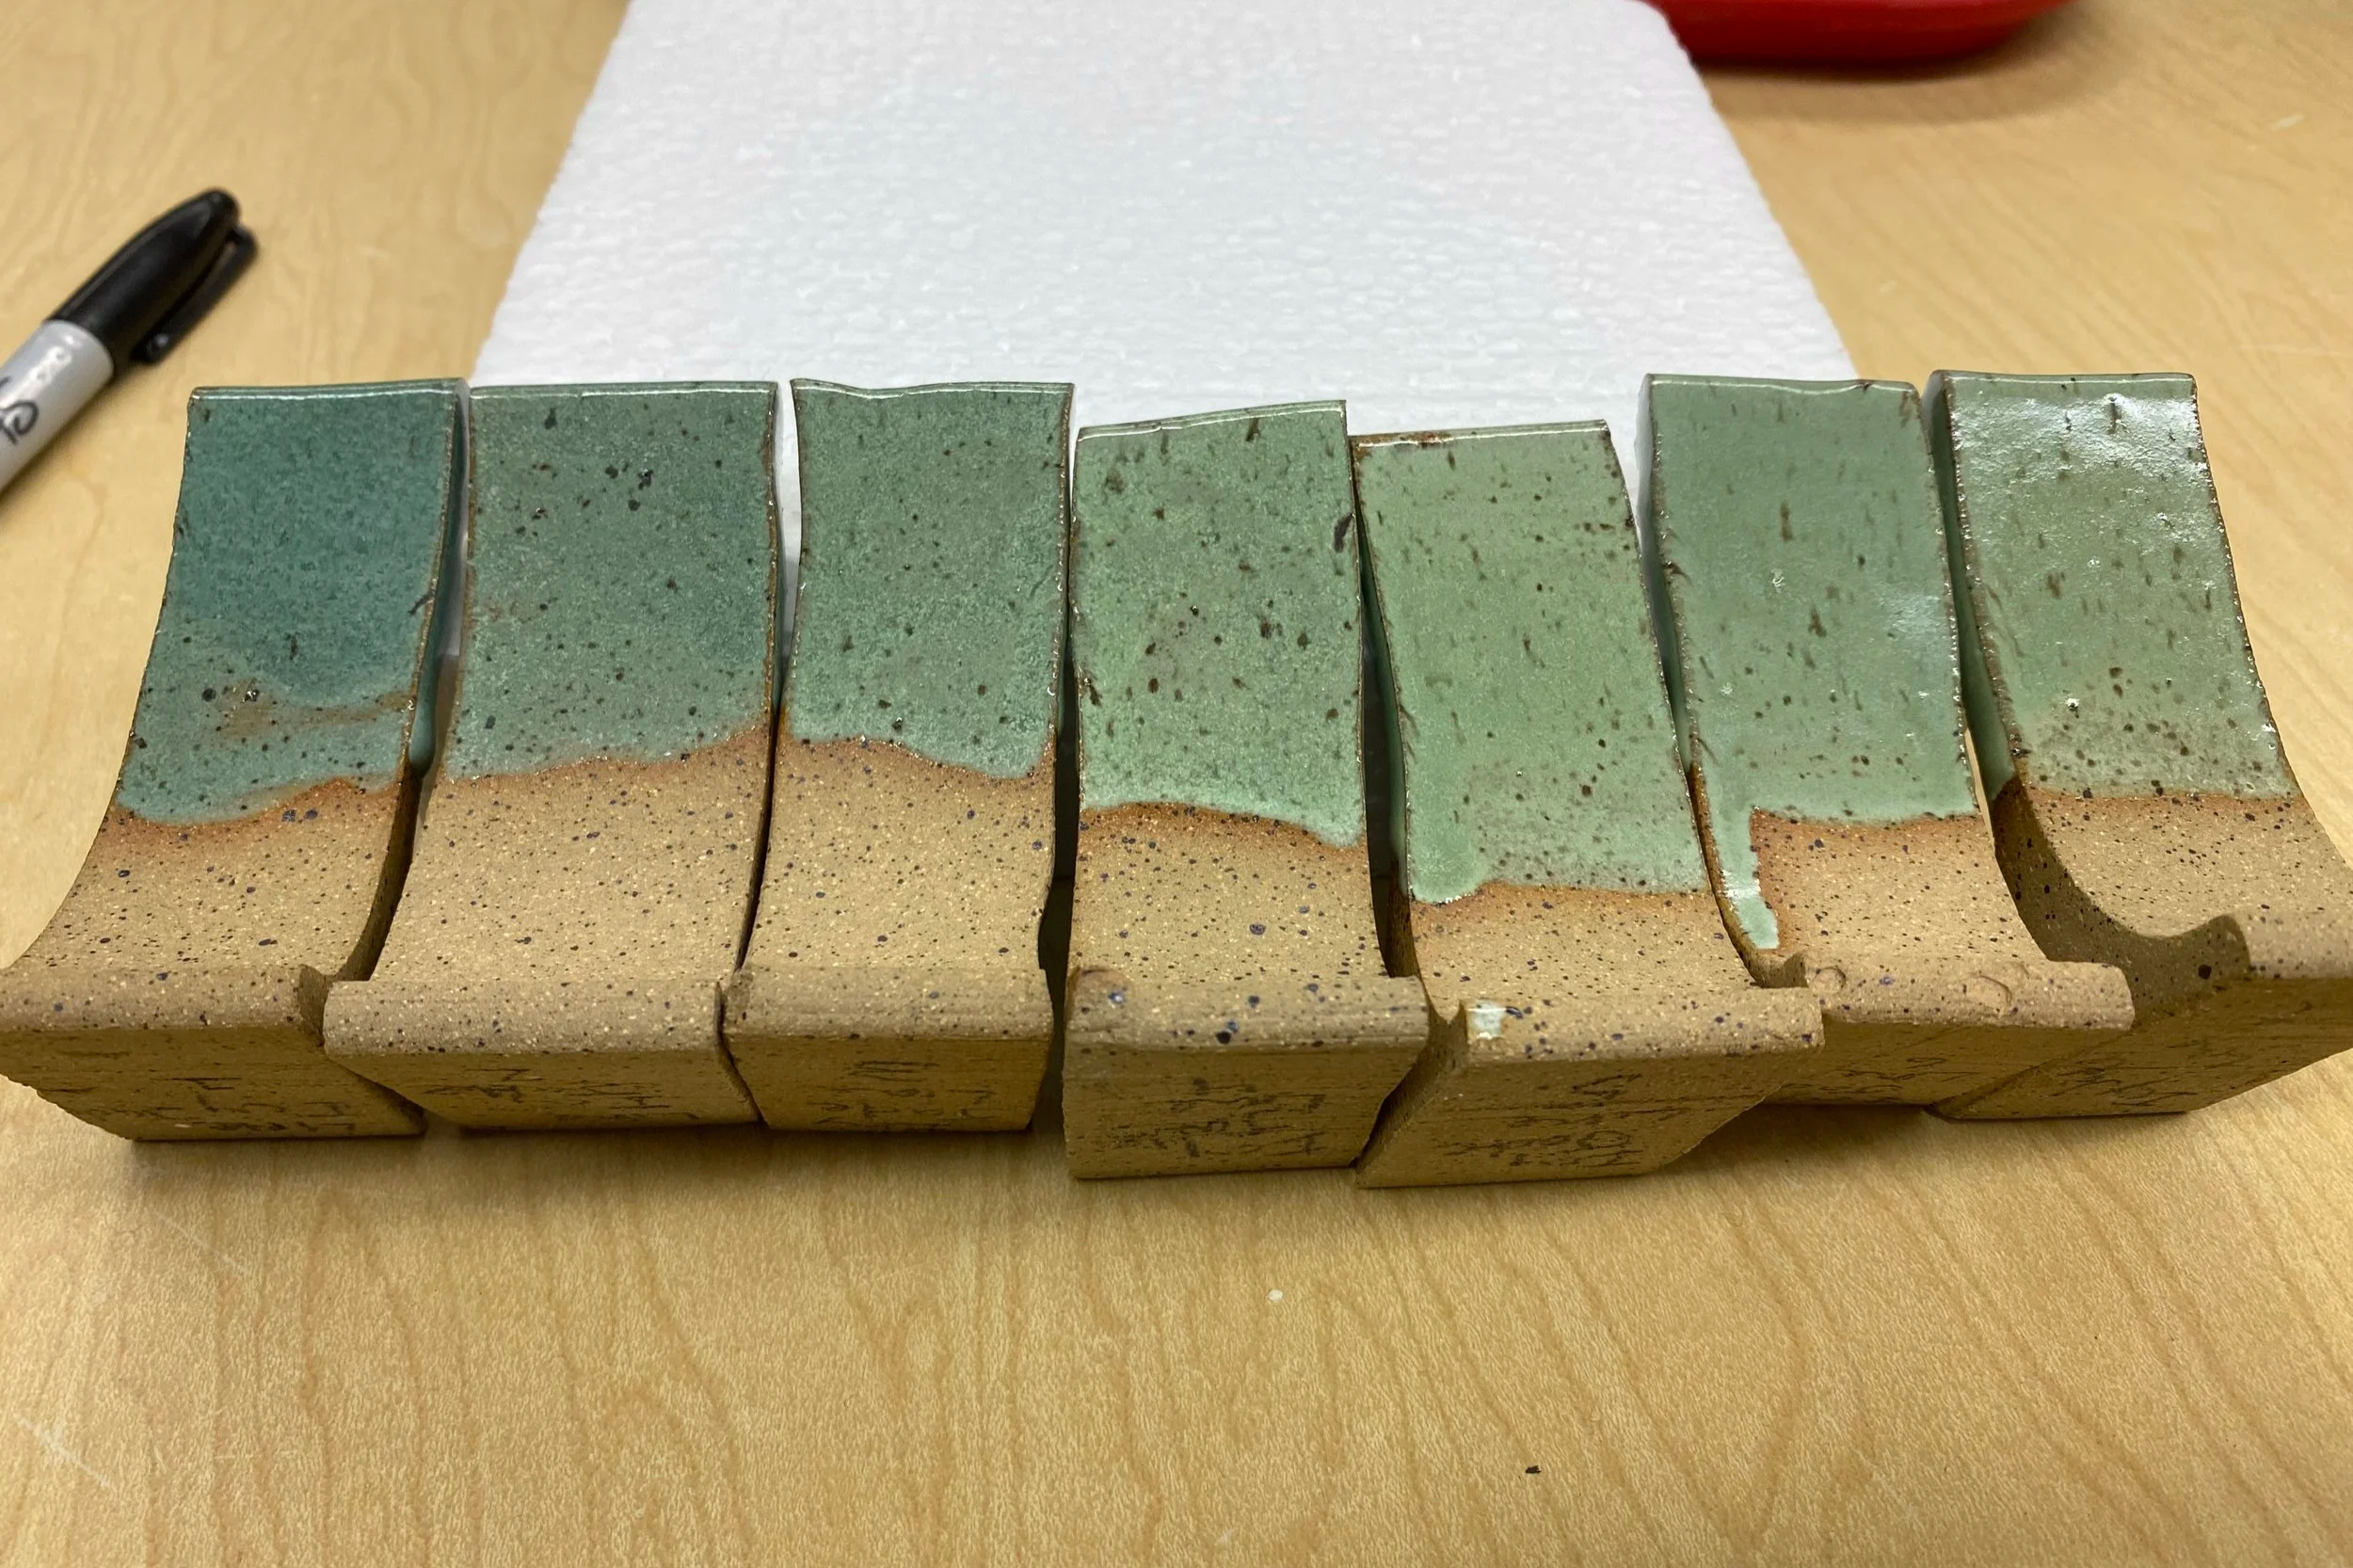
Icy Jade, Left - Right 0%, 1%, 2%, 3%, 4%, 5%, 6% Rutile added. On Standard 112 Brown to Cone 6.
Volumetric Line Blending
The line blend here shows the Icy Jade glaze recipe from 0-6% rutile (Left to Right). Volumetric Line Blending is the easiest way to get these tests done quickly and without wasting ingredients. Basically this method allows you to mix two small batches of glaze that you then mix together in different amounts to create a blend. But I won’t pretend that I can explain this any better than the resources available on Glazy, so take a look at these links and it’ll all make sense!
Here is a link to Glazy explaining the process - https://help.glazy.org/testing/blending
Read through and watch the videos. They explain it very well.
On the left hand side you’ll see a link for Blending Guides. Click on that and you’ll be able to download a pdf showing the amounts needed for line blends from 1×3 to 1×11.
Or click this link and you can download it from Glazy - https://help.glazy.org/downloads/blending-guides/BiaxialBlendAmounts30ml_v2_COLOR_Percent_18x24_2020.pdf
All I needed to buy for the line blend testing were some 30ml syringes. Make sure the ones you buy have all of the number marks on them and not just multiples of 5. I got mine online.
We mixed:
Batch 1 - 100g Icy Jade
Batch 2 - 100g Icy Jade PLUS 6% Rutile
Made sure the tests were each in the same size and type of container. Used an immersion blender to make sure they were well mixed. Then added water if needed to make sure the level of each glaze in the cup matched. This is extremely important!! The volume of each glaze needs to be the same.
Then followed the line blend instructions for a 1×7 blend. This meant that Test 1 would be 100% regular Icy Jade, Test 2 would be equivalent to 1% rutile added, Test 3 would be 2% rutile added and so on. And then Test 7 which is 100% of Batch 2 has 6% rutile added.
My test tiles aren’t as petite and easily dippable as Derek’s from Glazy. I ended up using the syringe to squirt the glaze directly onto the tile front and back. Then dipped my finger in the glaze and did a couple thin swipes on the front of the tile to see how it looks when really thin.
We’re really happy with the results of this test. We will likely use the recipe with 2% or 3% rutile in our studio.
Some Fun Facts About Rutile in This Glaze
As the rutile increases, the green color from the copper carb becomes less saturated of course. But more interestingly, the glaze actually becomes more of a matte finish. Rutile is highly refractory, which means its resistant to melting in high temperatures. So it makes sense to me that this glaze would become more matte (less melted/glossy) as the rutile percentage increases. In a glaze that has higher melt fluidity (runs more), the mattefying effect of the rutile would probably not be as obvious. But this glaze is already on the satin end of glossy.
Did you know Rutile is actually an impure version of titanium dioxide? I wonder what would happen if I removed the titanium from the recipe and used rutile as the only colorant. Or just increased the titanium and didn’t add rutile at all? A test for another day!
https://digitalfire.com/material/rutile
Icy Jade Cone 6 Glaze Recipe
G200 37.60%
Flint/Silica 26.30%
Gillespie Borate 11.90%
Dolomite 8.1%
Whiting 7.6%
Strontium Carb 4%
Bone Ash 1.5%
Titanium Dioxide 2.9%
Copper Carb 4%
Bentonite 2%
Here is the link to my Glazy recipe for Icy Jade - https://glazy.org/recipes/776861
This recipe is a really pretty jade green with copper carb and titanium dioxide. It’s actually a variant of Icy Blue, which is the same base recipe with titanium and cobalt carb instead.
This recipe started out with Gerstley Borate and the change over to Gillespie Borate did not have much effect on the overall look of it thankfully. BUT because now we don’t have Custer Feldspar available (this recipe is over 37% Custer), we are now using G200. The glaze definitely has a small difference in how it looks vs using Custer. But that’s how it goes with changing glaze materials! The pictured glaze is with G200.
I would love to hear from you if you test this glaze or learned something new from this blog post! Send me a message on Instagram, comment on the Glazy recipe, or shoot me an email!